
Table of Contents
How to Clean & Restore a Moldy Refrigerator Gasket (2026 DIY Guide)
Focus: Health, Energy Savings, and Appliance Maintenance
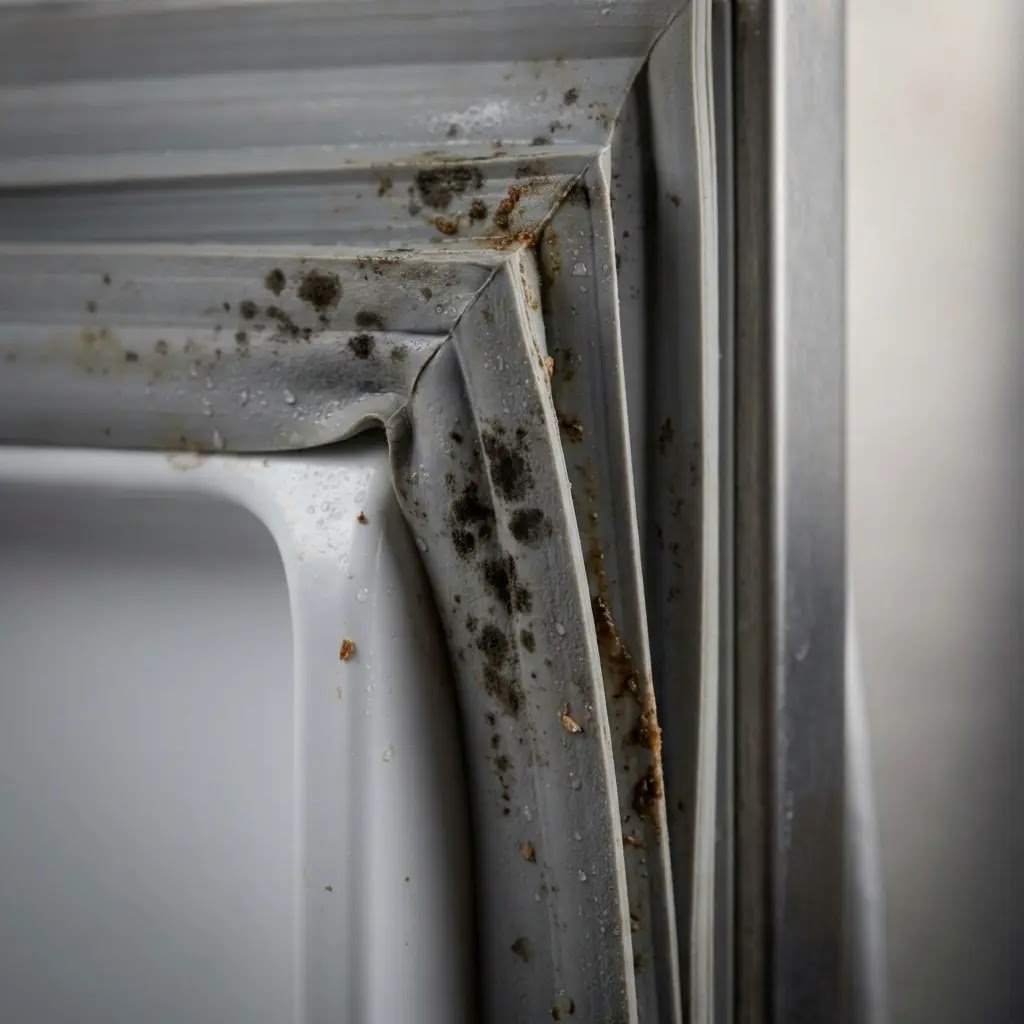
The Invisible Danger in Your Kitchen
Most people ignore that black gunk on their fridge door, thinking it’s just a bit of dirt. It’s not. That’s a living colony of mold. Every time you open the door, the vibration and air pressure send invisible spores directly onto your fresh food.
Technician’s Opinion: I’ve seen families struggle with recurring allergies only to find the culprit was the fridge seal. Before you spend $100+ on a professional or a new part, give me 10 minutes of your time. You can likely fix this yourself for under $5.
A leaky gasket isn’t the only thing killing your efficiency. If your fridge is still running hot after fixing the seal, follow my guide to [clean the refrigerator coil 5 easy steps] to clear out the dust choking your compressor.
Beyond health, a dirty seal is an energy vampire. If the rubber isn’t creating a perfect vacuum, your fridge leaks cold air. This causes the compressor to work overtime, often increasing your electricity bill by up to 25%.
Diagnostic: Is it Dirty or Dead? (The Dollar Bill Test)

Don’t waste time cleaning a seal that is physically broken. Before you grab the vinegar, perform this simple test:
Take a dollar bill (or a strip of paper) and place it halfway inside the door, then close it. Try to pull the bill out.
- The Result: If the bill slides out easily without resistance, your gasket is dead and needs replacement.
- The Win: If the bill is stuck or hard to pull, the seal is still structurally sound; it’s just dirty and needs restoration.
Why Vinegar Trumps Bleach (Safe Cleaning Science)

Your first instinct might be to reach for bleach. Stop. While bleach kills surface mold, it is a harsh chemical that draws moisture out of the rubber. Over time, bleach makes the gasket brittle, leading to cracks and tears.
The Better Solution: White Vinegar (Acetic Acid). Vinegar penetrates the porous surface of the rubber to kill the mold at the root without damaging the structural integrity of the seal.
Step-by-Step Deep Cleaning Process
⚠️ Health Alert: When cleaning black mold, always wear a mask and ensure the kitchen is ventilated. Scrubbing dry mold releases thousands of spores into the air.
Technician’s Secret: Spray the vinegar solution before scrubbing to dampen the mold and prevent it from becoming airborne.
- The Pre-Wipe: Use a dry microfiber cloth to remove loose crumbs, pet hair, and debris from the folds.
- The Vinegar Soak: Mix a 1:1 solution of white vinegar and warm water. Spray it generously into the gasket folds and let it sit for 3-5 minutes.
- The Crevice Tool: Use an old soft-bristle toothbrush or a Q-tip to scrub the deep valleys of the seal. This is where the mold hides.
- The Rinse & Dry: Wipe down with a damp cloth to remove vinegar residue. Crucial: Use a dry towel to remove every drop of moisture. If you leave it damp, mold will return within 48 hours.
According to [EPA guidelines on mold remediation], porous materials often harbor mold roots that bleach cannot reach, making acetic acid (vinegar) a superior choice.
Pro-Level Restoration: The Hairdryer Trick

Sometimes a seal is clean but warped, leaving small gaps where air escapes. This is common if the fridge was left open or is older.
Crucial Precaution: While using the hairdryer, keep it at least 4-6 inches away from the rubber. Excessive heat can demagnetize the internal magnetic strips, which would make the seal completely useless.
The Fix: Use a hairdryer on a low-to-medium heat setting. Wave it over the stiff or warped sections of the rubber for 1-2 minutes. The heat softens the rubber, making it pliable again. Immediately close the door and hold it tight; the rubber will expand and remold itself into a perfect, airtight seal as it cools.
Sometimes a warped seal causes the control board to panic. If your fridge starts beeping or showing a ‘temp’ warning after cleaning, check my [samsung refrigerator error codes fix] list to see if you need a simple sensor reset.
Lubrication: Petroleum Jelly vs. Silicone Grease

Once the rubber is clean and reshaped, you need to keep it supple.
Never use cooking oil. It goes rancid and actually helps mold grow while degrading the rubber.
Apply a very thin layer of petroleum jelly (Vaseline) or food-grade silicone grease to the hinge side of the gasket. This prevents the rubber from sticking and folding over itself, which is the #1 cause of gasket tears.
2026 Maintenance Checklist
| Frequency | Task | Benefit |
|---|---|---|
| Weekly | Quick wipe with a damp cloth | Prevents spill buildup |
| Monthly | Dollar Bill Test | Ensures energy efficiency |
| 6 Months | Vinegar deep clean | Kills microscopic mold |
| Yearly | Petroleum Jelly coating | Extends gasket life by 5+ years |
FAQ: People Also Ask
Q: Can I use baking soda?
A: Yes, a paste of baking soda and water is great for stubborn stains, but it doesn’t kill mold spores as effectively as vinegar.
Q: Why does my fridge seal smell even after cleaning?
A: The smell might be trapped behind the gasket. Check if the gasket is removable (many modern ones push-fit into a groove) and clean the plastic frame underneath.
Conclusion:
Restoring your refrigerator gasket isn’t just about aesthetics; it’s a vital step for your family’s health and your home’s energy efficiency. By following this DIY guide, you save money on repairs and keep your food fresher for longer. Remember, a dry seal is a healthy seal!
Gasket care is just the beginning. For a complete look at how to protect your kitchen’s most expensive appliance, take 5 minutes to read my full guide on [refrigerator maintenance extend lifespan].